Setup Guide
Get started with Purge.cc blocklists in your DNS sinkhole
Why DNS Sinkholing?
Using a DNS filter allows you to block unwanted content at the network level before it reaches your devices. This means that all devices within the protected network are subject to the same filtering rules.
Better Security
The internet can be a dangerous place with many hidden threats. Blocking malicious or suspicious websites at the DNS level—before they reach the user—limits phishing attempts, ransomware, online scams, and other malicious domains before they ever reach your devices.
Privacy Protection
The web represents only part of what happens online. Beneath the websites you see, numerous hidden services collect user data without restrictions. By using a DNS filter, you can prevent trackers, analytics, and telemetry services from monitoring your online activity, giving you back control of your personal data.
Content Filtering
The internet is full of information that may need to be controlled. By using content filter lists, you can block access to specific categories—such as adult content, gambling websites, or other unwanted categories—within your home or company network.
Possible Service Disruption
Implementing these blocklists may disrupt services, website navigation, and communications. Some features may stop working. Use at your own risk.
Read full disclaimers →Coverage Limitations
No blocklist provides 100% coverage. New trackers and malicious domains appear daily. For comprehensive protection, use additional security measures.
Read full disclaimers →Setting Up Pi-hole
Pi-hole acts as a DNS sinkhole on your network, intercepting DNS queries and blocking requests to known ad-serving, tracking, and malicious domains. Follow these steps to install Pi-hole and add Purge.cc blocklists.
Install Pi-hole
Pi-hole is a network-wide DNS sinkhole that blocks ads and trackers for all devices on your network. Visit the official Pi-hole website for installation instructions, then configure your router to use Pi-hole as its DNS server.
Access the Admin Panel
Once Pi-hole is running, access the admin interface in your browser. The default address is usually http://pi.hole/admin or http://<your-pi-ip>/admin. Log in with the password you set during installation.
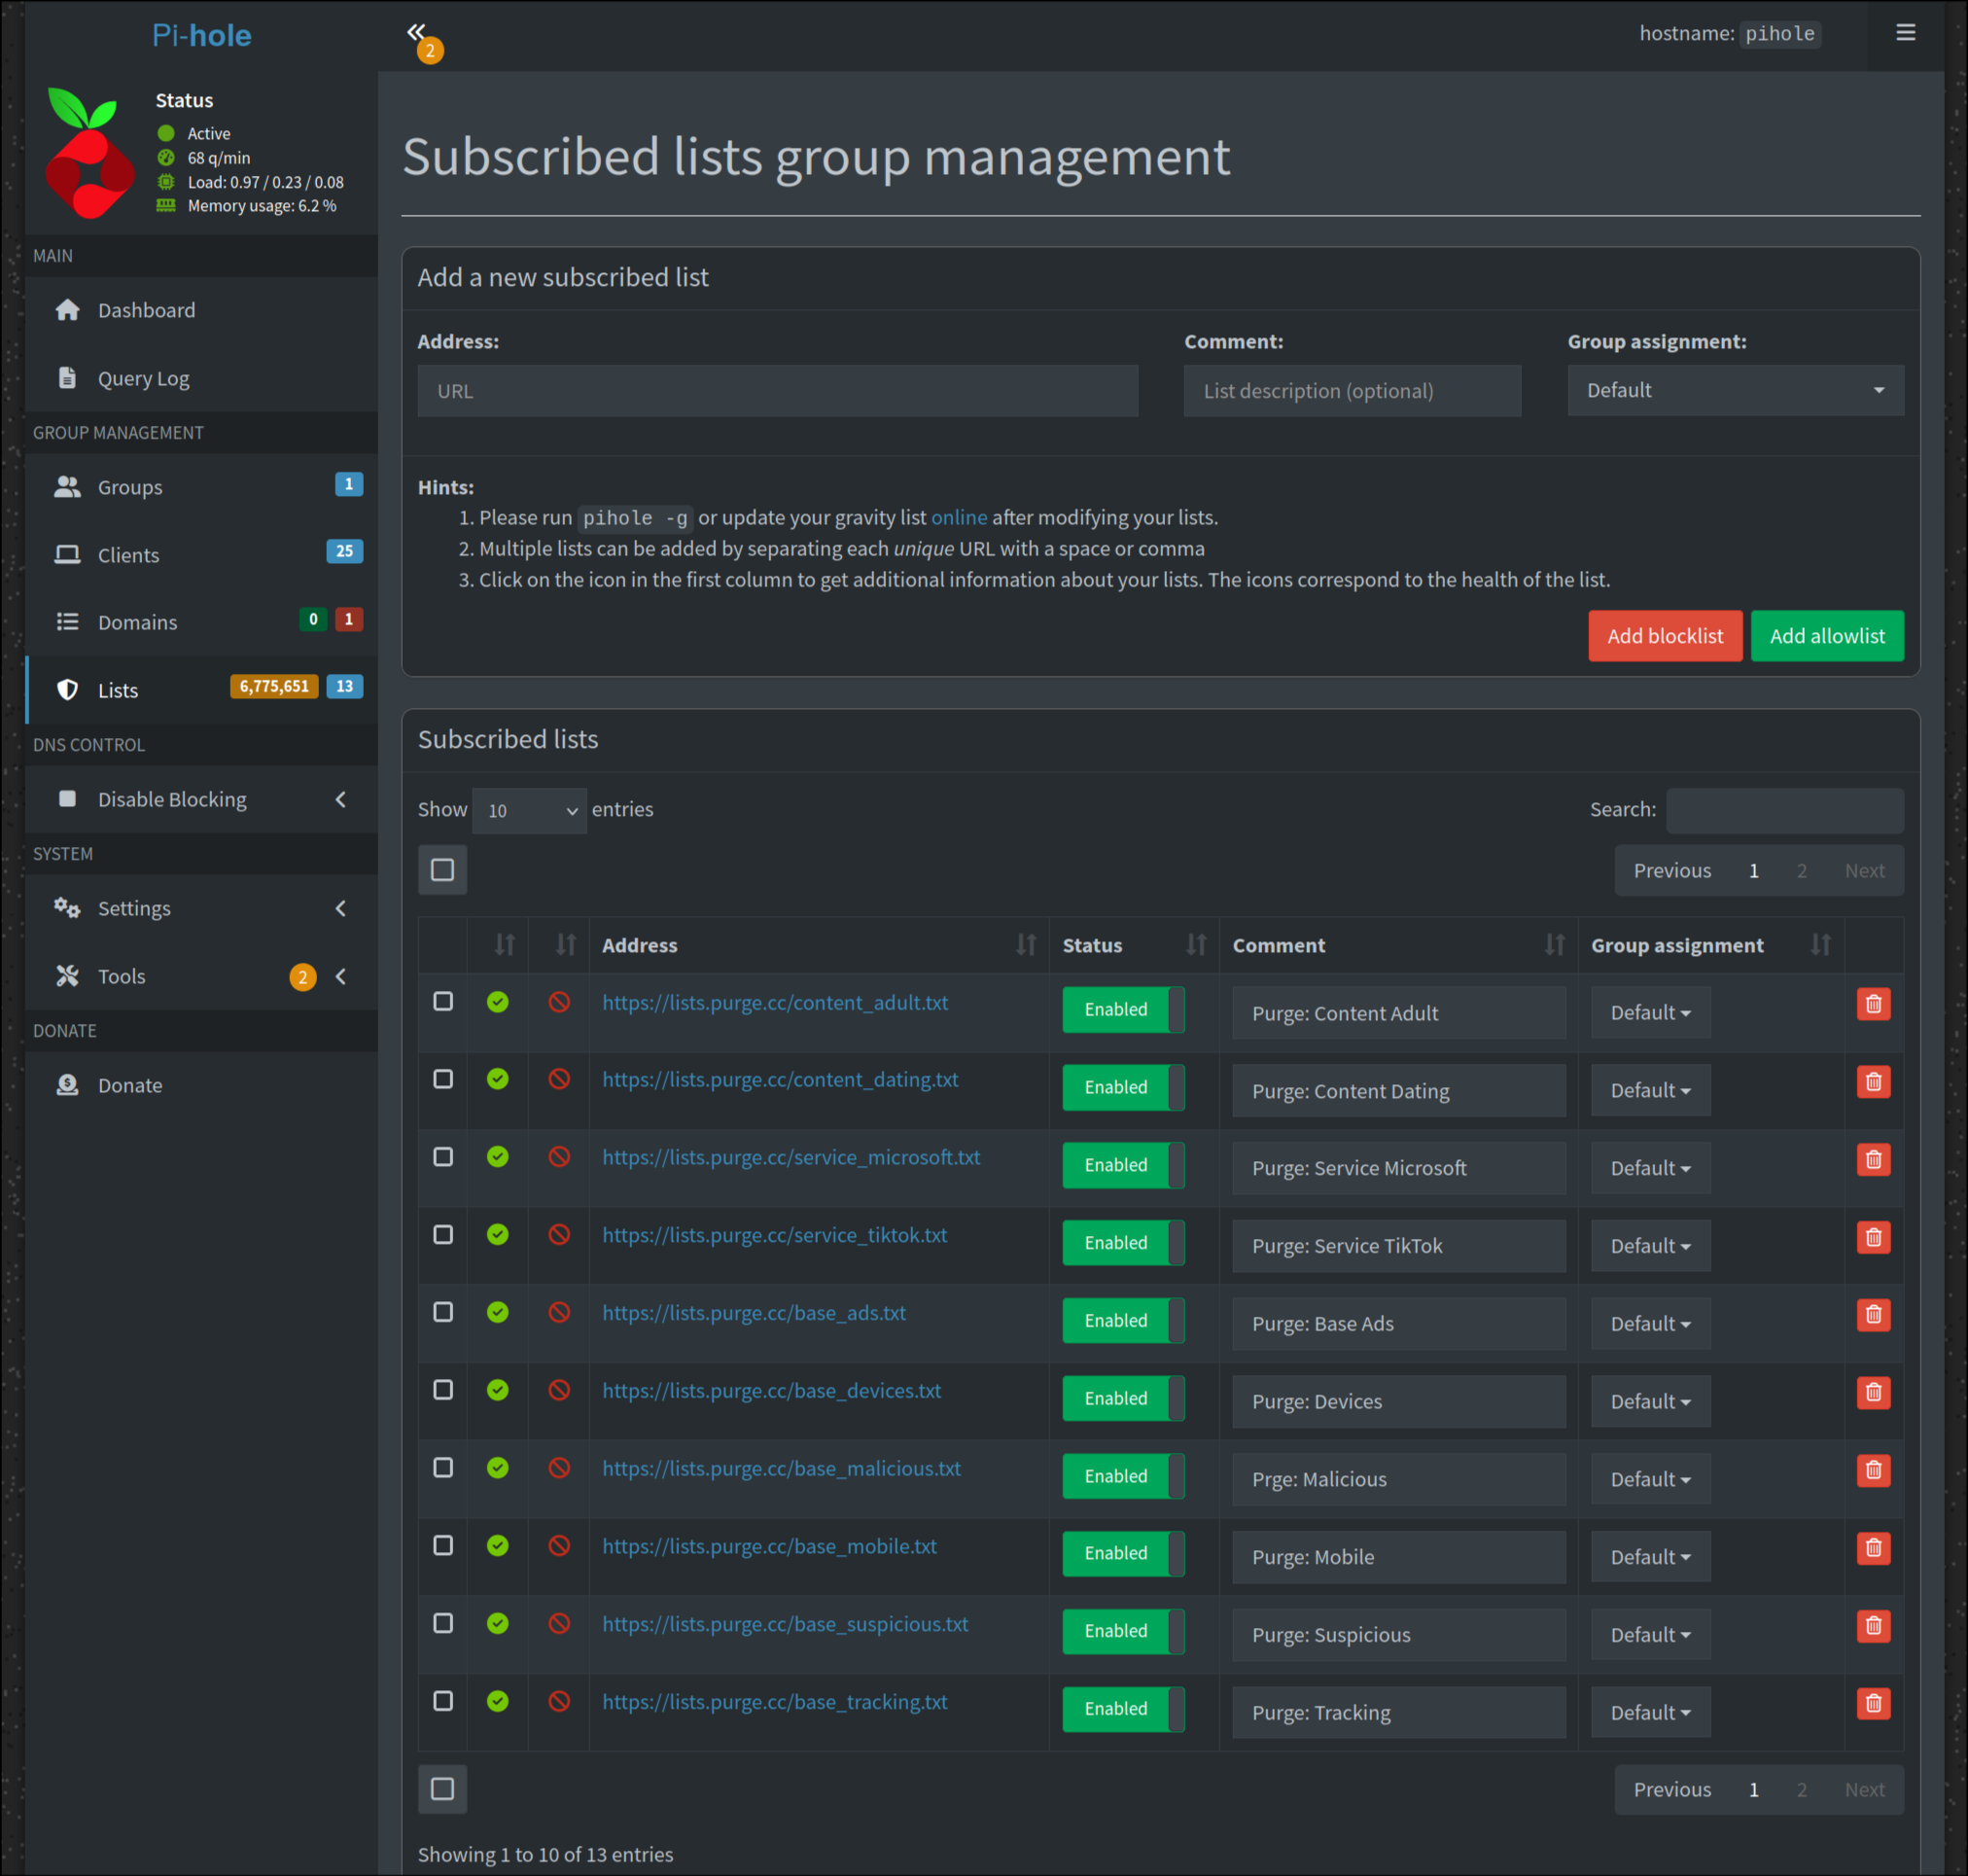
Choose and Add Blocklists
In the Pi-hole admin panel, navigate to Lists in the sidebar. Browse the Purge.cc lists page to find blocklists that match your needs. Copy the URL for each list you want, then paste it into the Address field in Pi-hole. Add a descriptive comment like "Purge: Base Ads" and click Add blocklist.
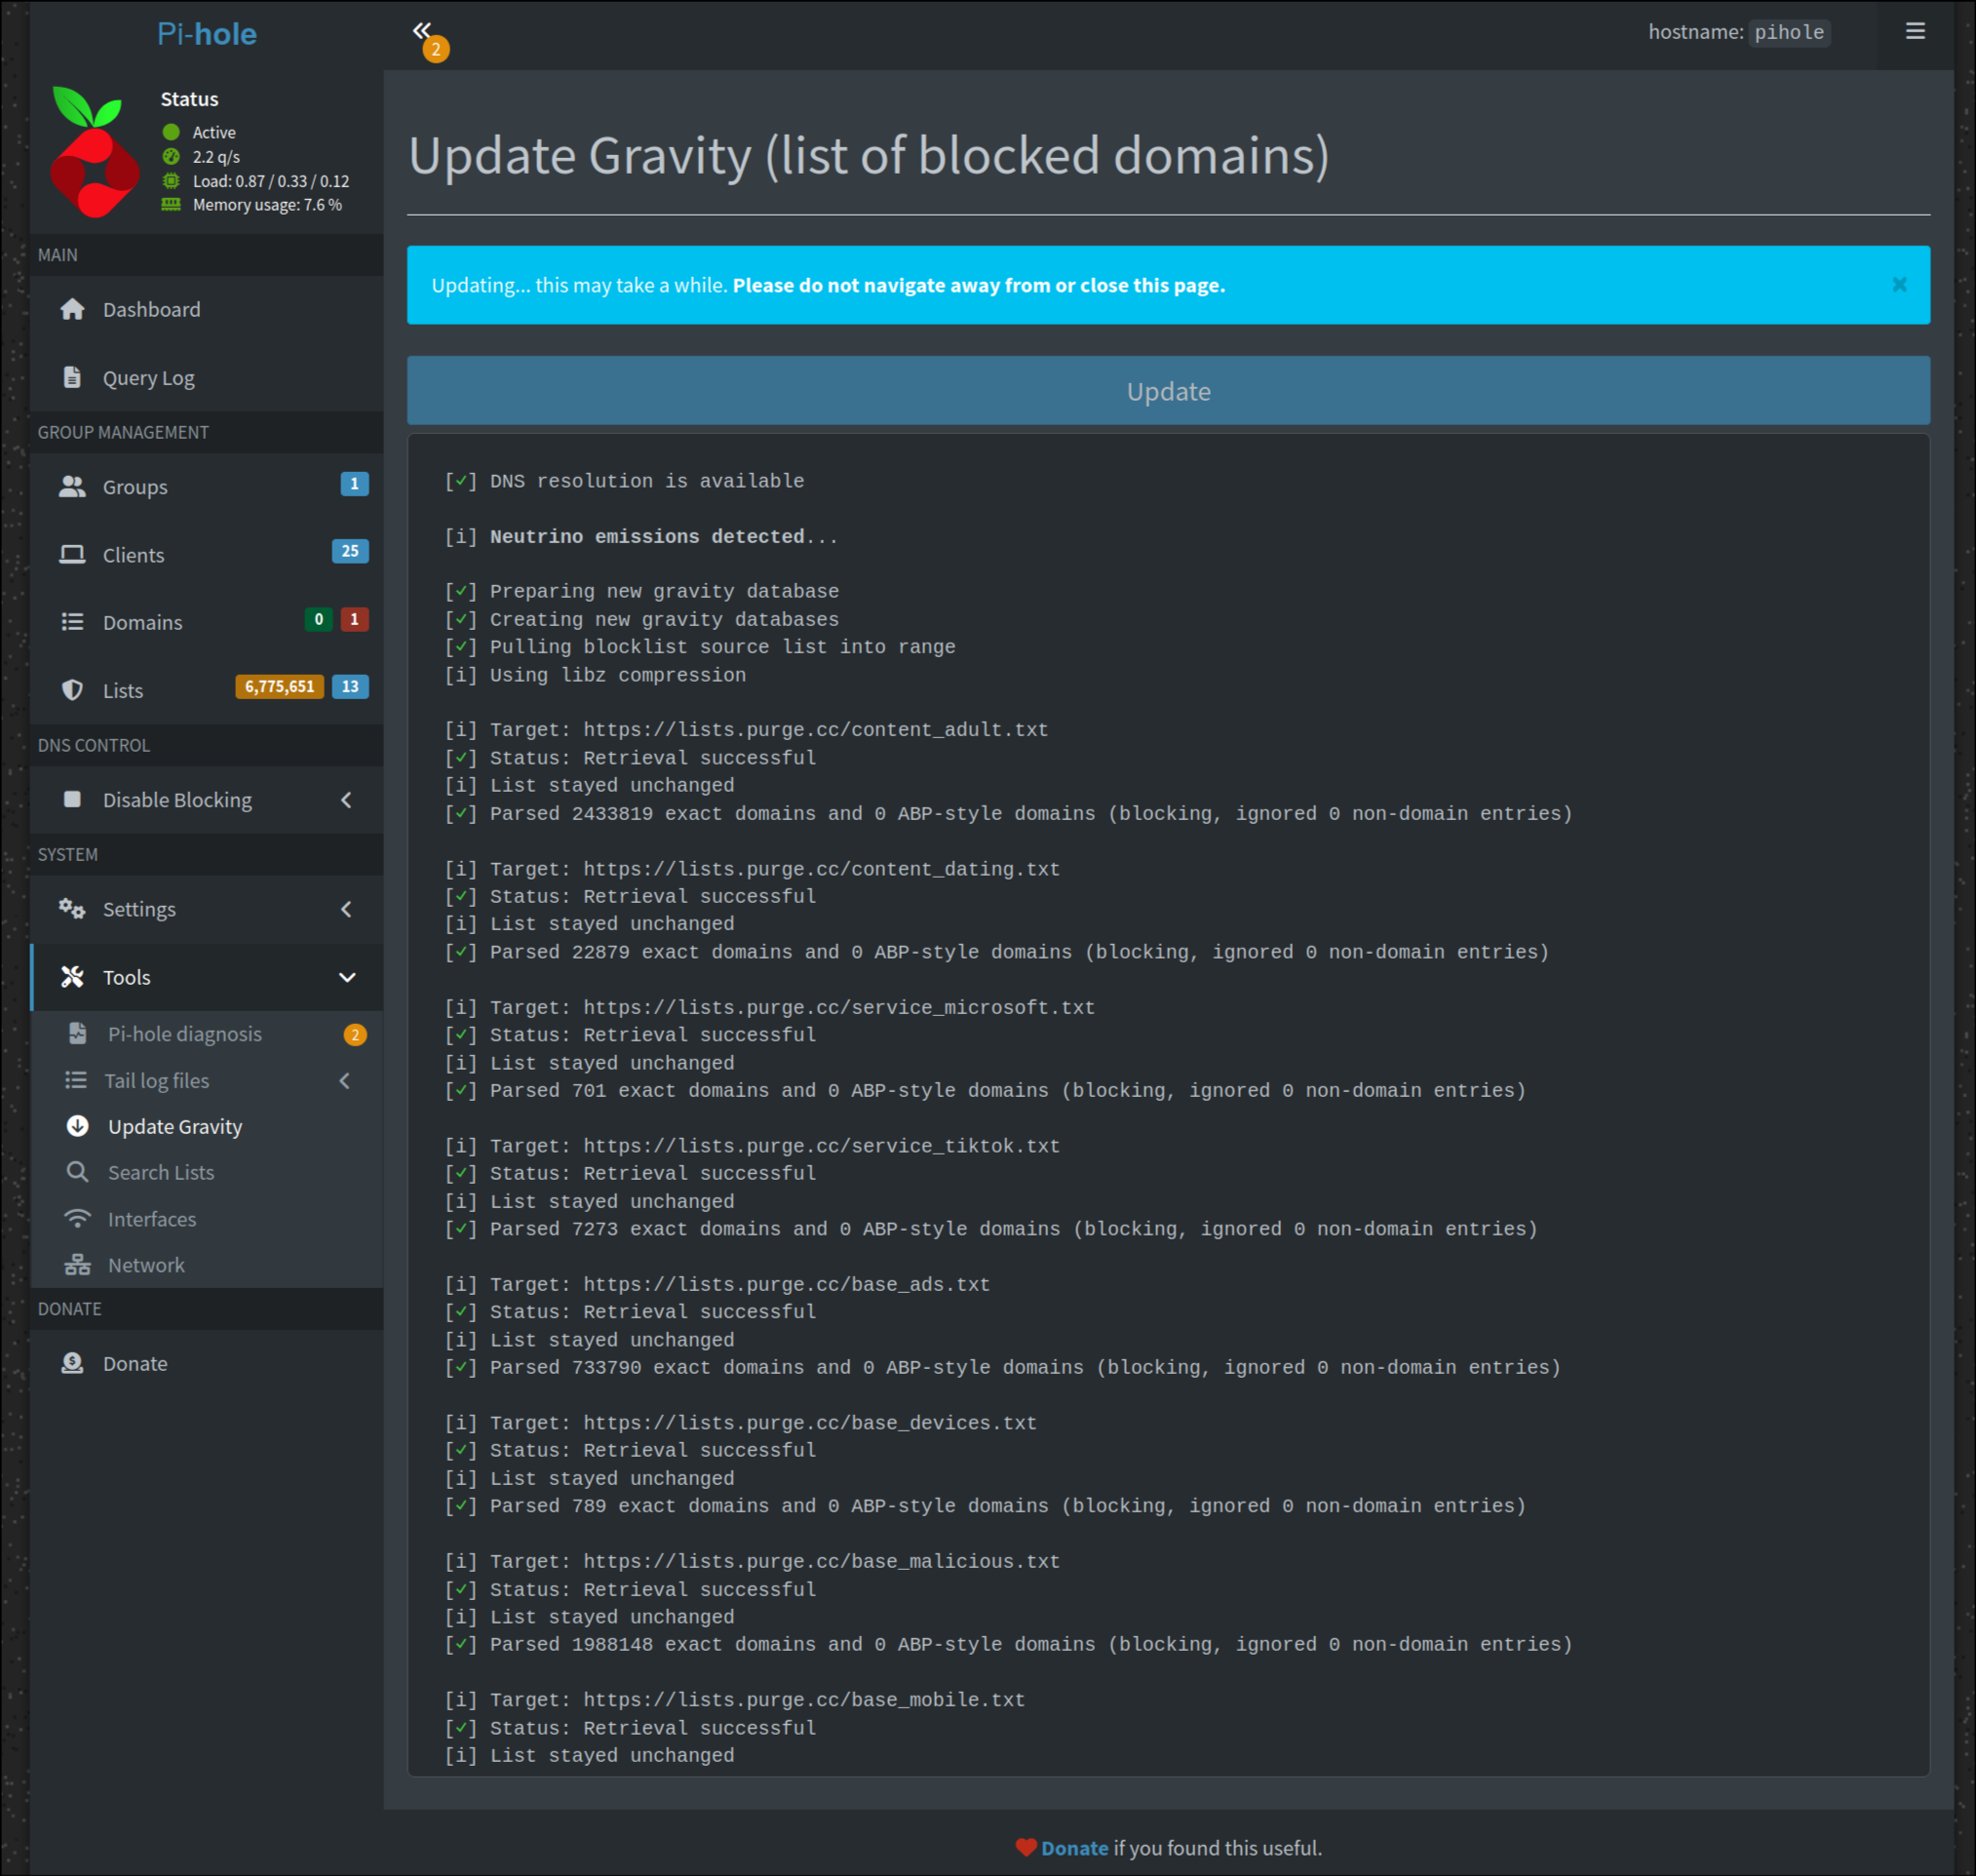
Update Gravity
After adding your blocklists, navigate to Tools > Update Gravity in the sidebar. Click the Update button to download and compile all your blocklists. This process may take a few minutes depending on how many lists you added.
Enjoy Enhanced Protection
You're all set! Pi-hole is now blocking ads, trackers, and malicious domains at the DNS level. All devices on your network are automatically protected. Check your Pi-hole dashboard to see real-time blocking statistics.
